To clean a grouse, start by plucking the feathers. Next, remove the entrails and rinse the bird thoroughly. Here’s a step-by-step guide for cleaning a grouse effectively. First, ensure you have the right tools and a clean workspace. Patience and attention to detail are key in this process. Cleaning a grouse may seem daunting at first, but with practice, it can become a swift and satisfying task.

How to Clean a Grouse: A Step-by-Step Guide for Beginners
Welcome, young hunters and nature enthusiasts! Today, we are going to learn all about cleaning a grouse, a fascinating bird that you may encounter in the wild. Cleaning a grouse can be an essential skill for anyone who enjoys hunting or outdoor activities. Don’t worry; it’s not as complicated as it may seem. With the right guidance and a bit of practice, you’ll be cleaning grouse like a pro in no time!
The Basics of Grouse Cleaning
Before we dive into the step-by-step process, let’s first understand why cleaning a grouse is important. When you hunt your own food, it’s essential to know how to properly clean and prepare it for cooking. Grouse, like other game birds, need to be cleaned thoroughly to remove any dirt, feathers, and internal organs before they can be cooked and enjoyed.
Step 1: Gather Your Tools
Before you begin cleaning a grouse, make sure you have all the necessary tools ready. You will need a sharp hunting knife, a cutting board, a bowl of cold water, and a clean cloth. It’s crucial to use a sharp knife to make clean cuts and avoid damaging the bird’s meat.
Step 2: Plucking the Grouse
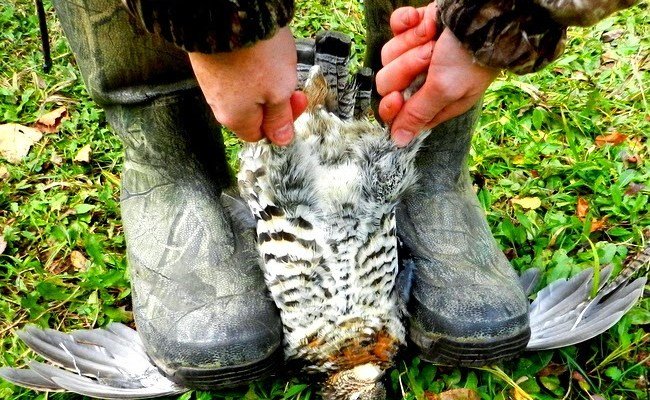
The first step in cleaning a grouse is plucking its feathers. Start by holding the bird firmly and plucking the feathers from the breast and legs. Gently pull the feathers in the direction of their growth to remove them effectively. Take your time to ensure you remove all the feathers, leaving the skin clean and smooth.
Step 3: Removing the Internal Organs
Once you have plucked the feathers, it’s time to remove the internal organs. Make a small incision near the grouse’s vent, being careful not to puncture the organs. Reach inside the bird and carefully remove the heart, lungs, and other organs. Discard them into a separate container or refuse bag.
Step 4: Cleaning and Rinsing
After removing the internal organs, rinse the grouse under cold running water to remove any remaining blood or debris. Use your fingers to clean the inside cavity thoroughly. You can also use a clean cloth to wipe down the exterior of the bird to ensure it’s clean and ready for cooking.
Tips for Beginners
Cleaning a grouse may seem daunting at first, but with practice and patience, you will improve your skills and efficiency. Here are some tips to help you become a more confident grouse cleaner:
Tip 1: Practice Makes Perfect
Don’t be discouraged if your first attempt at cleaning a grouse isn’t perfect. The more you practice, the better you will become at handling the bird and making clean cuts. Take your time and focus on improving your technique with each grouse you clean.
Tip 2: Stay Organized
Keep your tools and workspace organized to make the cleaning process more manageable. Having everything you need within reach will help you work efficiently and reduce the chances of making mistakes or losing track of important steps.
Tip 3: Seek Guidance
If you’re unsure about any step in the cleaning process, don’t hesitate to seek guidance from experienced hunters or online resources. Learning from others can provide valuable insights and tips that will help you refine your skills and become a proficient grouse cleaner.
Congratulations! You’ve now learned the basics of how to clean a grouse. Remember, practice and patience are key to mastering this essential skill for any outdoor enthusiast. By following the step-by-step guide and incorporating the tips provided, you’ll be well on your way to confidently cleaning grouse and preparing them for delicious meals. So, grab your tools and get ready to embark on this exciting journey in the world of hunting and outdoor activities!
How to Clean a Grouse
Frequently Asked Questions
How should I prepare a grouse for cleaning?
Before cleaning a grouse, ensure it is properly plucked and gutted. Have a sharp knife on hand, as well as a clean work surface and access to running water.
What is the best way to remove the feathers from a grouse?
To remove the feathers from a grouse, start by plucking them carefully by hand. It may help to singe the bird over an open flame to loosen the feathers before plucking.
How do I gut a grouse properly?
To gut a grouse, make a small incision near the vent and carefully remove the entrails. Be cautious not to rupture any organs during this process.
Is it necessary to wash the grouse after cleaning?
Yes, it is essential to wash the grouse thoroughly after cleaning to remove any remaining blood or debris. Rinse the bird inside and out with cold water.
Final Thoughts
Cleaning a grouse requires precision and care. Start by plucking the feathers, then remove the innards. Rinse the bird thoroughly to ensure cleanliness. Finally, store or cook the grouse as desired. Mastering how to clean a grouse is essential for both novice and experienced hunters.